Monday, February 10, 2014

Revitalized Lamps


All this bedding from an estate sale!
 
 
At an estate sale, I found a hand-made blue and cream Country French toile bedspread set with two matching shams, curtains, two decorative pillows, a round table cover, an extra bolt of fabric, and three lampshades.  Two lampshades were smaller, so they needed a small lamp base. Since I needed a couple of small lamps for a bedroom table, the one I use as a desk, finding the entire set with the two smaller shades was serendipitous. 
 
The photo shows the larger lamp shade.  I found a cute bird base for it.


After searching for lamp bases in local stores with little success, I finally found two at an on-line trading site.  They would need painting, but I fancied the shape with its old world style.
 
The gold color seems original, but the aqua looks sprayed on.
 
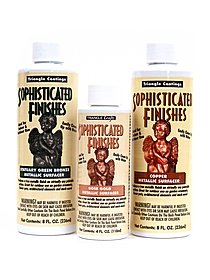
The lamps had been painted an aqua color that faded to gold, probably the original color since the bottom was the same gold tone.  Judging by their heaviness, they could have been expensive when they were new.  However, the gold with the painted-on aqua had to go. I found a small container of paint, Sophisticated Finishes, that can be used on many surfaces, including metal, in a blackened, oiled-bronze color.  It matches the oiled bronze finish in my kitchen. 

One coat on one lamp.  It only took about a teaspoonful of paint!

I left a few tiny areas of the aqua showing, as if it were bronze on copper.  I purchased the bottle at Michael's, but you can also find the paint here: http://www.misterart.com/static/images/grouppix/210x280/2000/g2175.jpg
Isn't it beautiful?


A funny thing happened on my way to take the lamps upstairs: I did a kind of double take and noticed that one of these lamps would fit in my kitchen where I worked on my laptop.  Since the original lamps came with nice quality white, but somewhat dirty shades, I  gently scrubbed them with a toothbrush, using a hydrogen-peroxide and Dawn solution.  They came out beautifully white, so the original plan was dashed.  The lamp bases have been reunited with their original shades.  So, instead of using the lamps in the blue toile bedroom, one of my new lamps has a new home in the kitchen where it matches other oiled bronze fixtures.  The other one found a spot atop a guest room dresser.  Perfection.


Now to find some lamp bases for the toile shades in the bedroom.  Deja vu?


Saturday, February 8, 2014

Frog Legs for Lent?


My husband, before he had his first cup of coffee this morning, asked the question, “Being a good, practicing Catholic, are frog legs OK to eat during Lent*?" He went on to say, “They are amphibians, but they taste like chicken.”
 
 
I told him that it was too early for a theological discussion, but then curiosity took over.
 
This photo is from the Froglegs.org site.  See link below.
Photos and recipes, here: Frog Legs 
 

It was an interesting question that I wanted to research, but that odd follow-up statement was in the back of my mind: Why mention that they taste like chicken? I searched the question of whether frog legs were acceptable for Lent, and found several laymen-type sites that said that frogs, being amphibians, were aquatic animals and therefore permissible.  However, I also found a statement that said that animal by-products were appropriate to consume, such as butter or milk, since they did not taste like meat. So now, I’m wondering, if frog legs taste like chicken, are they really OK?  This is turning out to be more perplexing than I first thought and will require more investigation. For now, everything indicates frog leg approval.
 
 
Here in the South, frog legs may be one more answer to “What’s for dinner?”  Imagine them like chicken wings, the little drumettes that are so popular with barbecue sauce, and also known as hot wings.  Frog legs are often served as appetizers with a white sauce as well.  
 

Carnival is underway with parades in many of the Gulf Coast cities, including Mobile, where the oldest carnival/Mardi Gras celebrations in the US take place. Mardi Gras is still a couple of weeks away, so for now, we can enjoy our frog legs without worrying about restrictions. Laissez les bon temps rouler!
 
*As you know, Catholics abstain from eating mammals and fowl on Fridays during the season of Lent, from Fat Tuesday (Mardi Gras) until Easter.  Denying oneself of certain foods is a type of penance.  The focus instead is on prayer, fasting, and almsgiving, not just in giving money but also in giving of our time and talents. 
            "In the poor and outcast we see Christ's face; by loving and helping the poor, we love and serve Christ." — Pope Francis, Message for Lent 2014


Friday, January 24, 2014

Hot Spiced Chai Tea

 
I've never met a Chai Tea I didn't like.  Iced, hot, coffee shop, prepackaged mix, tea bags, or whatever form it comes in: I like it!
 
A Teavana teapot that I love dearly!
 
 
However, I have never attempted to make my own from scratch, using spices in my pantry.
 
I found a recipe from Publix in The Birmingham News with all the Sunday coupons.
I have everything the recipe calls for, except the Coffee-mate.  Hopefully, I can use milk. 
 
Here is the recipe:
 
HOT SPICED CHAI TEA
Prep Time: 5 min / Cook Time: 15 min / Steep time: 5 min / Servings: 6
 
INGREDIENTS:
1 (2-inch) piece of fresh ginger, cut into thin rounds
2 (3-inch) cinnamon sticks
10 whole cloves
10 cardamom pods
3/4 tsp. whole black peppercorns
7 cups water
6 bags black tea
1 1/2 cups Nestle Coffee-mate Original Liquid Coffee Creamer
2/3 cup packed light brown sugar
 
DIRECTIONS:
Combine ginger, cinnamon sticks, cloves, cardamom, peppercorns and water in a medium saucepan.  Bring to a boil.  Reduce heat to medium; partially cover pan.  Heat for 10 minutes.
ADD teabags; steep for 5 minutes.  Remove tea bags.  Stir in Coffee-mate creamer and sugar.  Heat through.  Strain tea into teapot and pour into cups for serving.
 
I have several teapots.  This one from Portmeirion
is one of my favorites and is a millennium edition. 
 
OK; I won't need to serve 6, but I could probably drink enough for 3 servings.  So to make half, I need 1 1-inch piece of ginger, 1 cinnamon stick, 5 cloves, 5 cardamom pods, less than half a tsp peppercorns, 3 1/2 cups of water, 3 teabags, 3/4 cups of creamer and 1/3 cup brown sugar. Got it.  I will use ground cardamom since that's what I have; maybe 1/2 teaspoon and we'll see how it goes. 


I'll begin by using my electric tea kettle to heat the water.  That saves so much time!  If I am going to put this into a teapot, I'll need to temper the teapot which as you know simply means to preheat it with hot water so that the beverage stays hot longer.  Thus, I'll boil additional water.  While that's heating, I'll place my spices into a mesh bag.  That makes it easy to remove the spices later.  


Hope the ginger is the right amount of thinness.  I usually grate the ginger if I want a little to go a long way.


The spices go into the saucepan.  Since I preheated the water in my teakettle, I just pour the 3 1/2 cups into the saucepan to bring back to a boil with the spices.  
After 10 minutes, the teabags are added for an additional 5 minutes on the stovetop to steep. 


To speed things up, I preheated the milk in the microwave, so I add the warmed milk to the spice mixture and then the brown sugar, making sure it is all nice and steamy.
 
 
Now to pour out the water in the teapot, and pour in the chai tea in its place and put the tea cosy on top.  Side note: If you don't have one, a tea cosy is quite simple to make, and it keeps the beverages nice and hot during tea. Mine is made from two basically egg-shapes but flattened on the bottom, large enough to fit over the tea kettle, lined and interlined with the thinnest of foam rubber. It really holds the heat in.


The result?  A simply delicious cup of hot spiced chai tea!


The ground cardamom worked well in place of the whole pods. The Coffee-mate may make for a richer tea, but this is perfectly wonderful using 2% milk.  If I changed anything, it would be to add less sugar, perhaps a quarter cup instead of a third cup, and if I were making the full batch, cut it back to 1/2 cup.  As with everything sweetened, that's a matter of taste. 


I've had my second cup, so the rest will go into the refrigerator for a quick warm-up tomorrow. 
 
 
Cheers!


Thursday, January 23, 2014

Feathered Friends


Cool weather has brought additional birds to the feeder in the backyard.  One reason seems to be the peanuts that I added this year.  My husband’s adorable family enjoys a round of Dirty Santa each Christmas.  I usually won’t steal since I like to dive under the tree for an unopened gift, but if someone steals from me, then I delight in getting something fabulous in return.  This year, I took a bird feeder and food.  Getting home, I found that it was a bag of peanuts from Wild Birds Unlimited.  True to its name, I have seen an unlimited amount of birds since then. The photos are shot through a double-pane glass, so I apologize for the translucency.
DSCN0194
The Tufted Titmouse is a frequent visitor, but it doesn’t stay still very long.
DSCN0210DSCN0228
Robin Redbreast was an early guest this year, staying until the food is gone.  I have to replenish once he’s had his fill.
DSCN0225DSCN0232
The cardinal stays year-round.  He seemed comfortable hanging out near the poinsettias.
The woodpeckers are drawn to the suet and peanuts.
DSCN0253DSCN0242DSCN0258DSCN0250
The wren I know well and love dearly.  I’m not sure what the grey and white birdie is.  He has a yellow patch on his rump and under his wing.  He has quite an attitude, too. Look at that expression!

Wednesday, January 22, 2014


Damask and Houndstooth Curtains
 
My daughter bought a house recently that had only blinds as window treatments.  She found a curtain that she liked online, a black and white damask with under panels of Houndstooth, but it was less than half the size she needed since her windows are extremely wide.  Armed with a photo of the one she wanted as inspiration, we began searching for fabric to recreate it in a much larger size.
We found the black and white damask easily in an over-sized print, but we had to order the black and white Houndstooth in order to get the larger size she desired.  We purchased a yard of each design plus three yards of lining since the lining was not as wide.  We decided 6 yards of cording would be about right since the top sections wouldn't show once attached to the board, so cording is only needed for the front and inside sections of the side panels.  Four inches of the top of each piece will be stapled over the board, so no need to cord those parts, either.
 
 
 I used braided trim laid over the design to get an idea of how we wanted the center panel to look.  The yardstick shows the approximate width of 45 inches across the top. Gift-wrap tissue was used to follow and trace around the main pattern, following the shape created by the cording.  This tissue pattern was used to cut the lower shape so that it dipped in the middle, creating the center section of the window treatment.  The same tissue was used to echo this shape for the outer Houndstooth panels. 


Each piece of fabric was then trimmed with braided cording in black.  The cording is sewn over the fabric which is right side up, using a zipper foot. 
 
 
Then, right sides together, a lining was attached to each piece using the zipper foot once again, leaving the top of each section open for turning.  There is no need to sew the upper edges, since these will be stapled down.

A black tassel was added to the bottom edge of the center panel.
 We measured and positioned the outer panels to be four inches more than the edge of the finished window on each side to wrap to the side, or return, making a more professional touch.
Three L brackets were attached to a plank of 1" X 4" lumber, in the length of her window, so that a ledge of 4 inches will be created.  The bottom 'L' of the brackets will be attached to the wall once the fabric is stapled to the lumber.

First, the Houndstooth panels were wrapped to the sides and top, beginning at each end of the wood to cover the side of the lumber and with enough excess to wrap over the top about 4 inches, using a staple gun.  Staple the short side first, then wrap the front section over the top, making a neater look.  I forgot to take photos since I was so engaged with the staple gun.  Attach the opposite side in the same manner.

The damask piece was centered on the lumber on top of the Houndstooth panels and stapled in place.
Finally, the L brackets were then attached to the wall. 
Voila! Easy, inexpensive, and beautiful window treatment.
Summary:
1. Determine width of window plus a couple of inches longer on each side to give room for attaching brackets.  Purchase 1x4 lumber in this width. In other words, if the window is 68 inches wide, add 4 inches making the lumber 72 inches long.  Add height to allow space to attach 'L' brackets, probably 3 inches or so. Thus, the board will be about 3 inches higher than the window. Hint: mark the drill holes for the brackets before doing anything else: Much easier that way! At least 3 brackets are needed for a wide window to keep the center from sagging.  I suggest placing the brackets a couple of inches inside the edge. (May I add that if you choose a 4 inch L bracket, it will be 4 inches higher than the window.)
2. Purchase fabric.  The two outer panels will not need to touch in the middle since this will be hidden behind the center panel. I cut my fabric in half vertically for the two panels. Determine how long you want the finished panel to be and add 4 inches to the top plus bottom seam allowance.  Five extra inches should be plenty. 
Remember when purchasing fabric to add the 3 or so inches are mentioned above for the brackets plus the 4 inches over the wood so that your finished product isn't too short.  Again, I repeat, if you want your finished panel to be 15 inches from the top of your window for example, add 3 inches for the height of the top of the wood with the brackets under it plus 4 inches that will be wrapped over the top of the wood.  Thus, your finished piece will be 22 inches long prior to stapling and two feet of fabric will be enough to include seam allowance.  Allow for pattern repeat if needed.
We purchased a yard of each design; each was 54 inches wide. The fabric for the side panels was cut in half vertically.  
3. Make a tissue paper pattern for the line you wish to follow. Think bold lines.  Tiny scallops are hard to sew.
4. Cut fabric, making sure patterns are lined up evenly.
5. Attach cording to right side of fabric along inside and bottom edge. The cording will face inward.
6. Sew lining to fabric, right sides together with cording on the inside.  Do not sew top closed.  Turn fabric right side out and press. Cording will now be on outer edge. 
7. Lay side panels on lumber so that 4 inches extend over top of wood, adjusting as needed. Staple side first, then front, using staples to hold fabric in place or use tacks as adjustments are made.  The top will not show, so it does not have to be perfectly neat.
8. Place center panel over wood, ensuring the center of the panel is on center of the lumber.  Wrap over top of lumber and staple.
9. Attach brackets to wall.
10. Enjoy the fruits of your labor!
 

Tuesday, January 21, 2014

A Rare and Beautiful Flower: Georgia Aster

A Rare and Beautiful Flower: Georgia Aster
December 6, 2013 (I'm a little late posting, but I wrote this in December.)


Today I learned a little about propagating asters.  I didn’t know that there were so many varieties, ranging from 8 inches to 8 feet tall.  Plus, they come in a wide variety of colors in white, blue, and pink.  I love how quickly you can gain expertise by searching the web.  One person wrote about how her blue ones turned red, and a writer from Old Farmers’ Almanac responded that it probably reverted to its original colors instead of remaining hybrid.
I have one lonely plant that is a Georgia Aster (Symphyotrichum georgianum).  This perennial wildflower is apparently endangered, or close to it, if for no other reason than it blooms in so few places in Georgia,  Alabama, the Carolinas, and in only one location on the Florida panhandle.  This beautiful, violet-bluish-purple flower is happy to be ignored, which is fine by me.  Considering it is a low-maintenance plant, I want it to take a prominent role in my garden.  However, will it grow here?  Should I invite an endemic plant to a non-endemic site?
A friend gave me this plant last spring when she placed two tiny pots in my hands with the question, “Do you have time to plant this today? It has to go in the ground now and I’m headed out of town.”  Looking down at the bedraggled, nearly leafless stalk, I asked what it was, and she replied, “It’s a Georgia Aster.  They’re endangered.”  So, I took the two little scrawny, half-dried up, wilted little things home and immediately placed them in the ground by my front steps, so that I’d remember to look after them.  One never revived, but the other grew and sent up two stalks, about 2 feet high, covered with buds on the ends of the stems.  One lone little flower popped open in late August, giving me a hint of what was to come, but the rest waited until October when the stalks became top heavy and had to be staked.  I have to say, the leaves are nondescript, dry-looking and lance-shaped.  But, oh my goodness, what a beautiful show when it bloomed.
The deeply colored blooms opened over the course of two months and remained lovely throughout the autumn.  Little by little, the flowers turned brown, dried out, and became fuzzy little balls. This was my cue to take the seed heads and save them.  Hence, my curiosity for learning how to propagate them was peaked and today seemed a good day to see what their needs are for helping these little seeds turn into seedlings.  They are just too lovely not to attempt to increase my one aster into several plants.  However, one gardener reported that the seeds are self-sterile, so I’m keeping my fingers crossed that my plant is not.
Read Florida blog here: http://hawthornhillwildflowers.blogspot.com/2010/10/georgia-aster-symphyotrichum-georgianum.html
                                                                                

Monday, January 20, 2014

Dill Sauce

Dill Sauce

Recipe from Southern Lady Magazine

Delicious! Make in advance to allow flavors to mingle when possible.
 
§  1/3 cup low-fat mayonnaise (I used low-fat olive-oil mayo)
§  1/3 cup sour cream
§  2 Tbsp minced fresh dill
§  2 tsp prepared or grated horseradish (You can also use horseradish sauce.)
§  1 tsp fresh lemon juice (I added lemon zest and a little extra lemon juice)
§  1/4 tsp garlic powder or garlic salt
§  Salt and freshly ground black pepper to taste
§  Fresh dill sprigs for garnish
Mix all ingredients together.  Garnish with fresh dill sprigs or a twist of lemon rind. 
Use on crab stacks or on baked or grilled salmon fillets.